User Guide: How to Manage Multifactor Authentication
Multifactor Authentication (MFA) requires users to log in with the correct User ID, password, and another form of authentication, such as identity confirmation through an authentication app or an email address. Access to Fannie Mae browser-based applications requires the use of MFA.
This guide explains how to access and manage MFA settings via Manage Multifactor Authentication page the including:
How to access Manage MFA settings
- Log in to a Fannie Mae browser-based application.
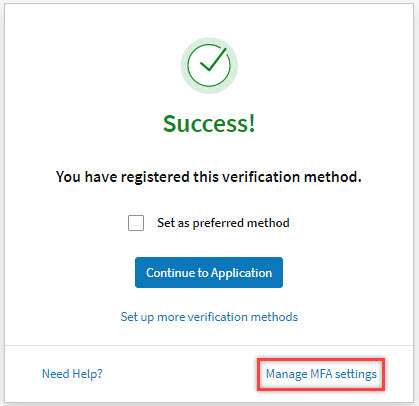
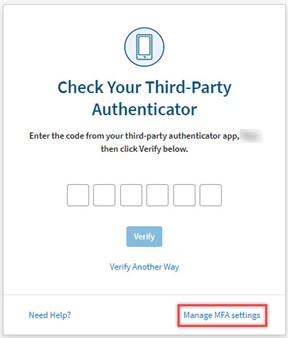
Click Manage MFA Settings in the lower right-hand corner in any of the authentication screens. Don’t make any entry in the boxes.
- This example shows third party authenticator as the method initially chosen at set up.
Verify MFA based on the authentication method initially chosen at set up for Manage MFA Settings. This example shows third party authenticator as the method chosen at set up.
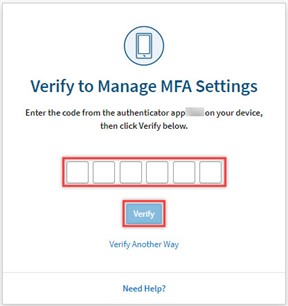
Note: Refer to User Guide: How to Verify Multifactor Authentication for more details on how to verify using a registered MFA verification method. The verification screen is slightly different from the screenshot in this User Guide, with Verify to Manage MFA Settings as header.
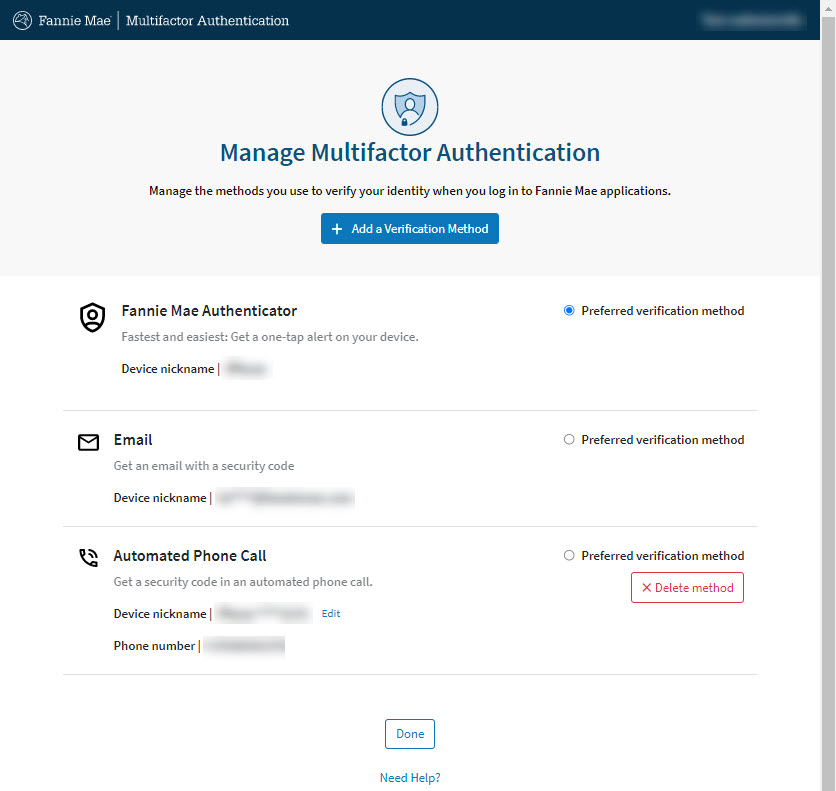
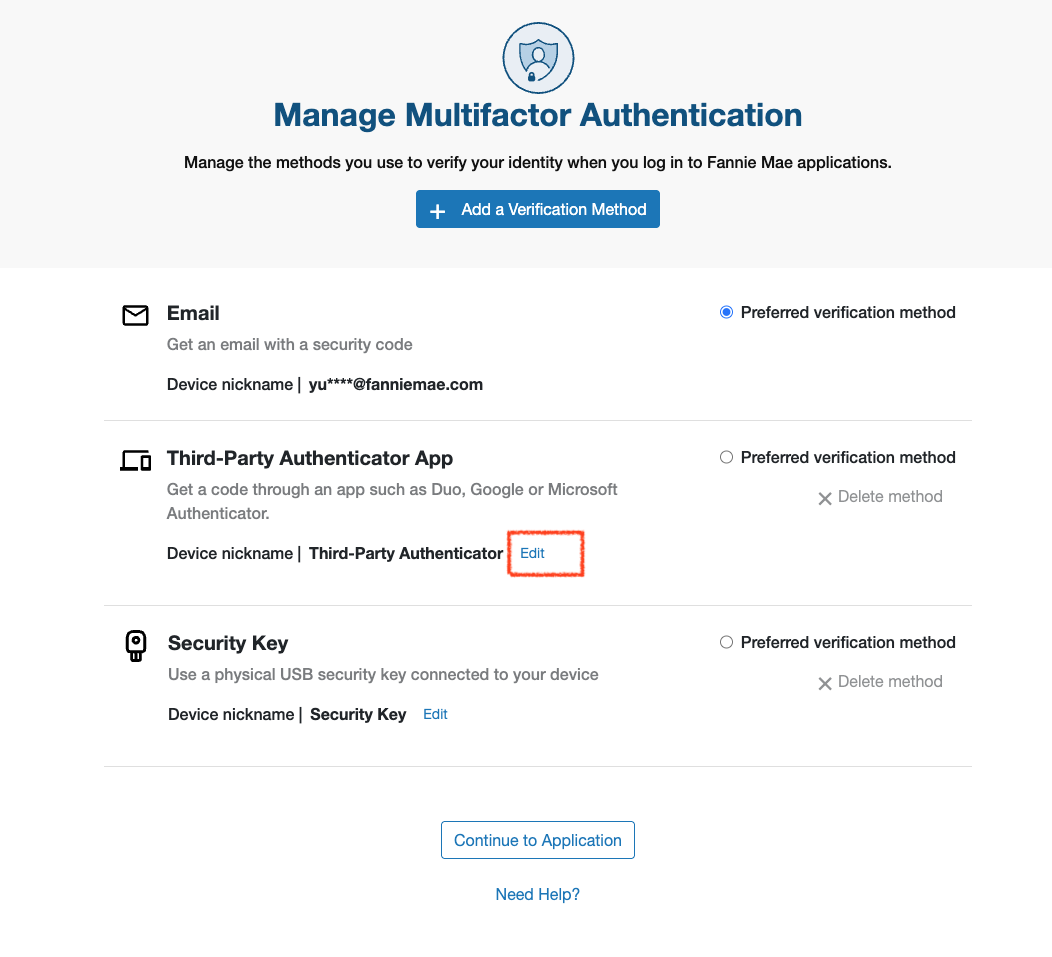
- Once successfully verified, the user is redirected to Manage Multifactor Authentication page.
Add MFA Verification Method
This section explains how to add an additional MFA verification method after the initial set up.
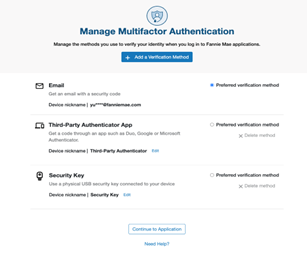
From the Manage Multifactor Authentication page, click Add a Verification Method.
Note: Each user can only set up a maximum of 10 devices.
- Setup any authenticator method as needed

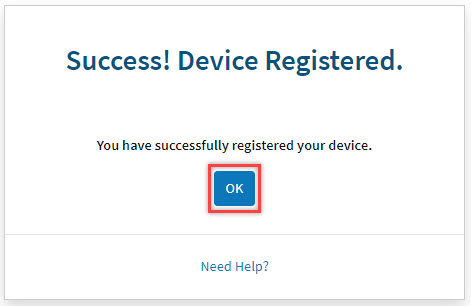
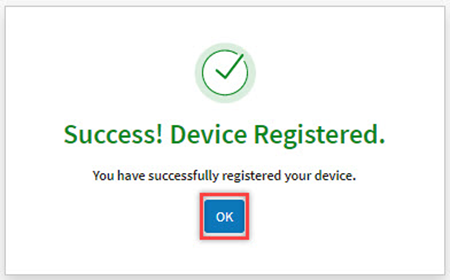
3. Once successfully registered, select OK.
Note: Refer to User Guide: How to Set Up Multifactor Authentication for more details on how to set up the MFA verification method
4. You will receive an email confirming your selection. You can make additional changes to MFA settings via Manage Multifactor Authentication screen or click "Continue to Application".
Delete MFA Verification Method
This section explains how to delete the MFA verification method.
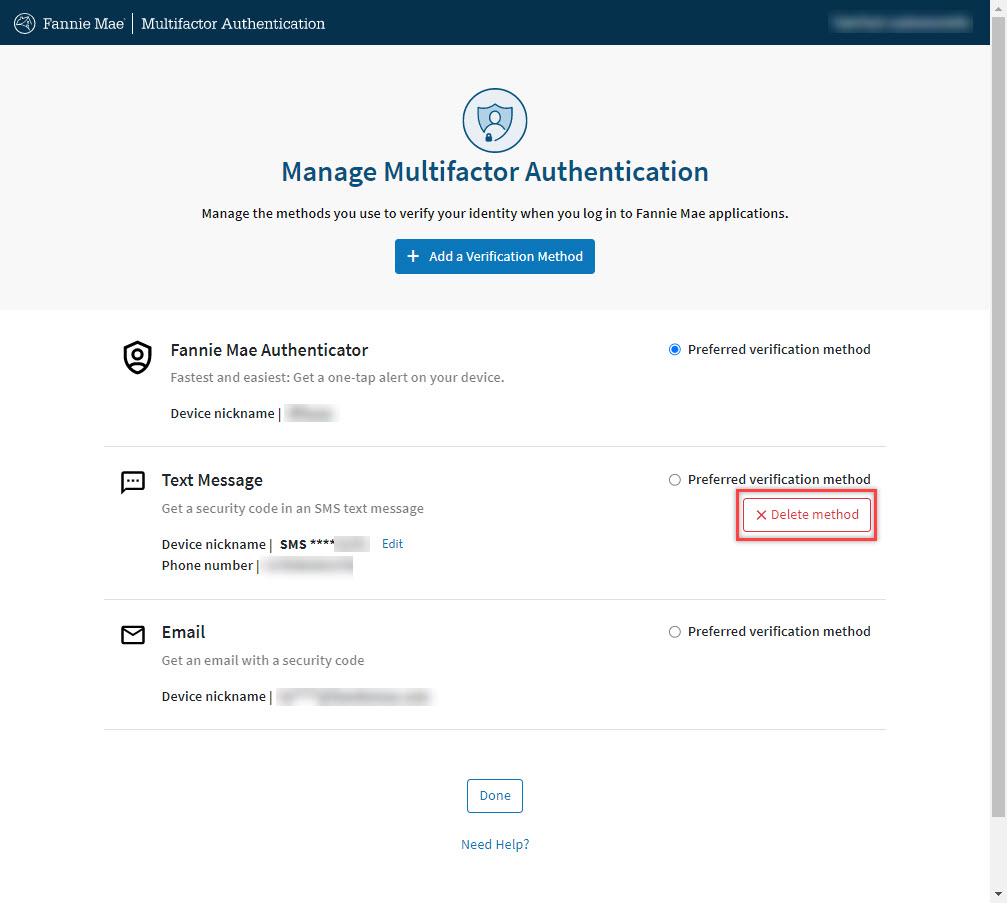
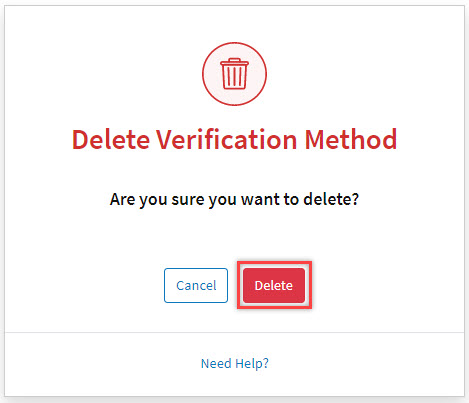
Select Delete method next to the MFA verification method you want to delete.
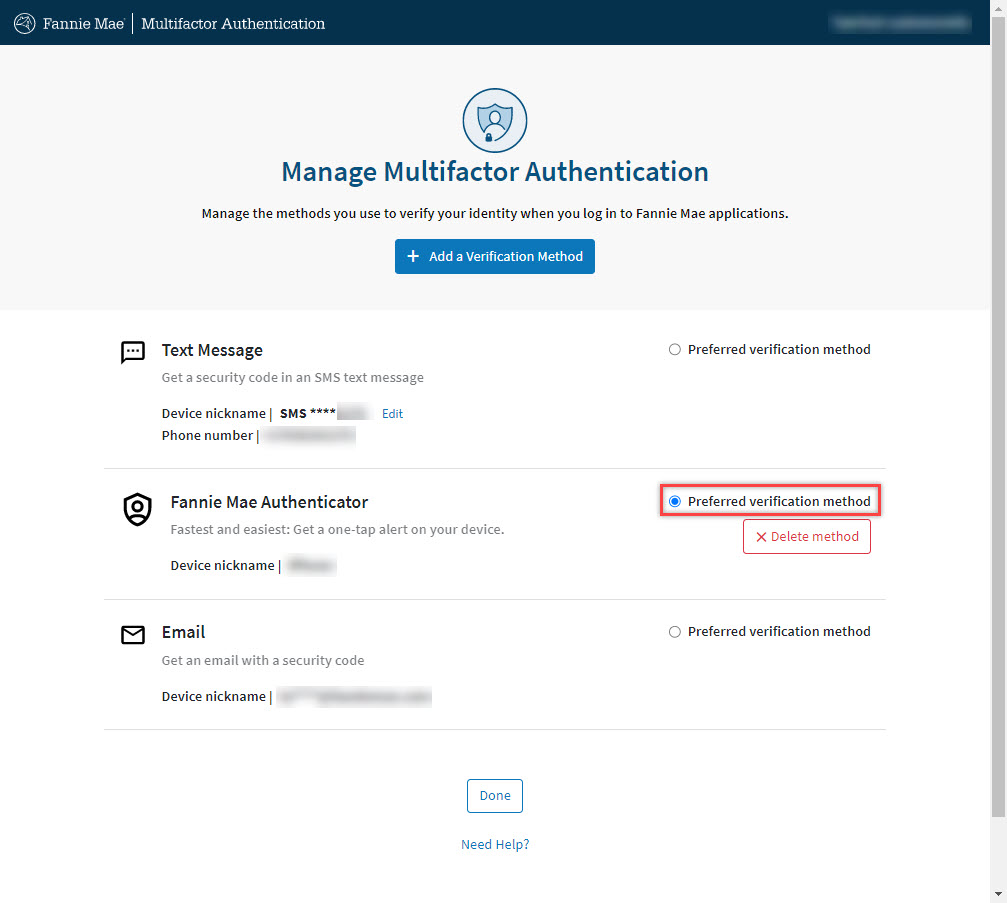
Note: The user cannot delete the email method nor the method that is set as preferred verification method.
To delete the current preferred MFA verification method, refer to Change Preferred MFA Verification Method section to first set a different method as preferred.

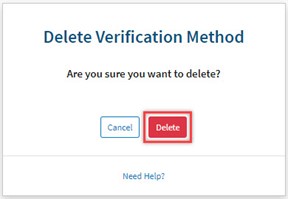
- Click Delete Method for the verification method to be deleted.
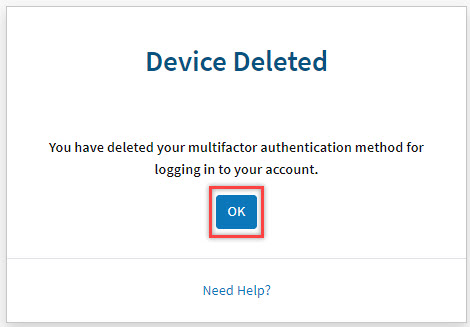
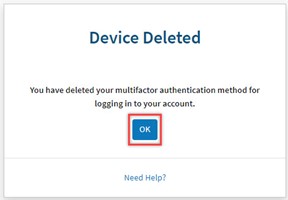
- Select OK on the Device Deleted screen.
- The Manage Multifactor Authentication Screen will open. You can make additional updates or continue to application by clicking on the Continue to Application button.
- You will receive a confirmation email for the deletion.
Change Preferred MFA Verification Method
This section explains how to change the preferred MFA verification method.
- Click the radio button next to the MFA verification method you want to set as preferred.

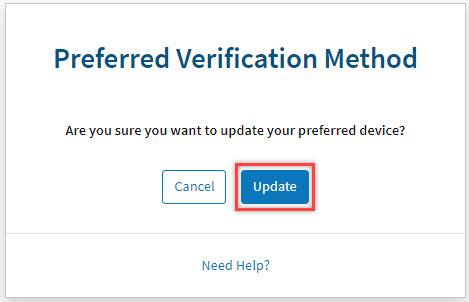
- Select Update on the Preferred Verification Method screen.
- Select OK on the Preferred Method Updated screen.
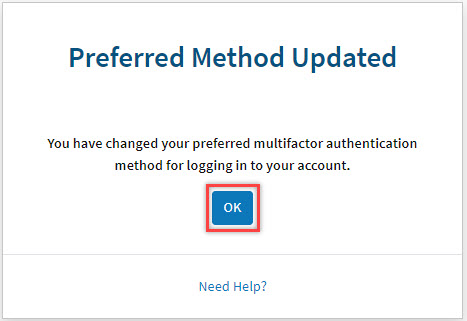
- Make additional change to MFA settings or select Done to continue to the Fannie Mae application.
- You will receive a confirmation email.
Change Device Nickname
This section explains how to change the device nickname.
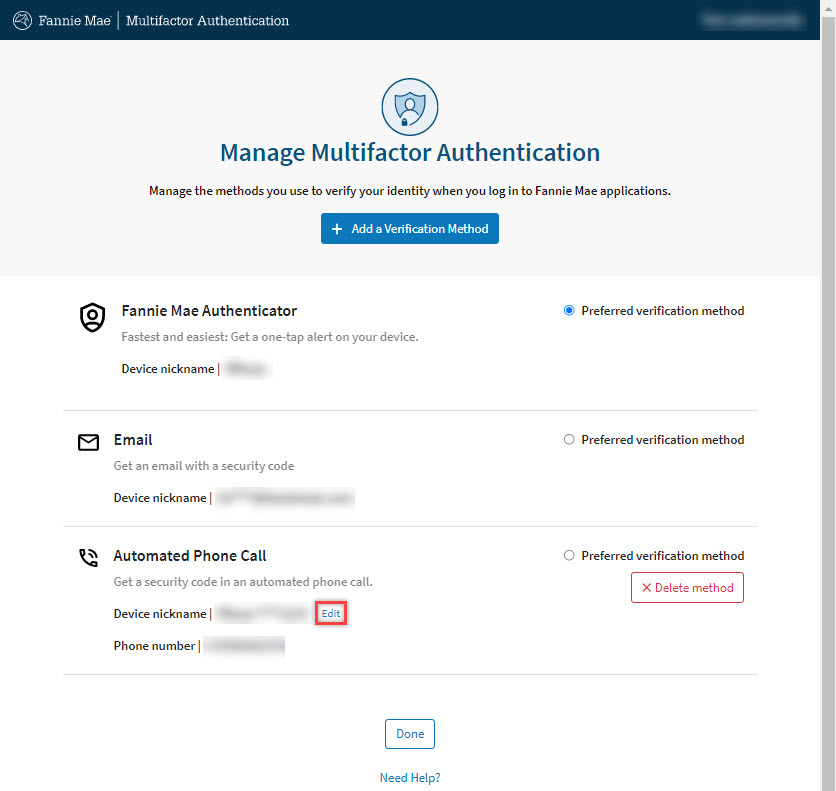
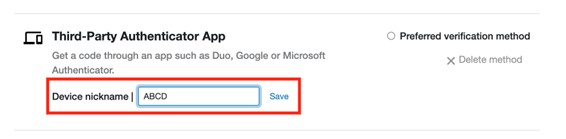
Select Edit next to the device nickname you want to change.
Note: You cannot change the device nickname for the email method.
Edit the Device Nickname, then select Save.
Note:
The Device Nickname can contain numbers, letters, and the following special characters: space ( ), asterisk (*), hyphen (-), underscore (_), and apostrophe (‘). The maximum length is 30 characters.
- The Manage Multifactor Authentication Screen will open. You can make additional changes or click Continue to Application button to continue to the Fannie Mae application.